Sunday 17 June 2018

Portfolio

INTRODUCTIONVigyanAshramNIOS_1NIOS_2

Myself, Bipin Baban Bhingare, was born on 15\06\1997 to my loving parents Mr.  Baban Bhingare and Mrs. Mandakini Bhingare .
I am From Roha Village In  Raigad Taluka in Maharashtra District. The following document provides an insight into my skills and interests.


EDUCATION

DBRT
Vigyan Ashram, Pabal, Pune
2017-18
10th
J.M. Rathi English Medium School Roha Raigad
2013-14


DBRT AND VIGYAN ASHRAM

DBRT, Diploma in Basic Rural Technology is a one year vocational program offered by Vigyan Ashram and is recognized by GOI’s National Institute of Open Schooling. The course is divided along four sections, namely:
  • Energy and Environment
  • Workshop and Engineering
  • Home and Health
  • Agriculture and Animal Husbandry


What I gathered from Vigyan Ashram’s DBRT course
  • Multiple Skills
  • Skills applicable in real life or relevant skills
  • Taking contract work and earning
  • Leadership, teamwork and work sharing values
  • Physical and spiritual growth through meditation, yoga, exercises and sessions
  • Entrepreneurial and business oriented mind-set
  • Learning while doing

FUTURE PLAN

I want Do courier In Hotel Management.


SKILLS

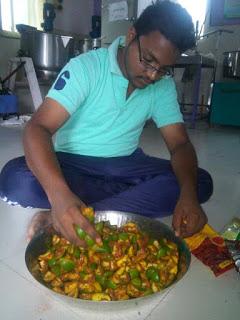
  • I Can Cook Food Really Good.
1. I can Draw Engineering Drawing Accurate
2.Plumbing
3.Electrical Basic Works
       4. Workshop Any Works


The following table lists down the skills or activities which I can confidently claim to exhibit:
Agriculture and animal husbandry
Home and health
Energy and environment
Workshop
Goat farming, poultry, azola  bed, playhouse, aquaponics
, hydroponics, soil testing,
Nursery ,T.D.N. ,FCR.
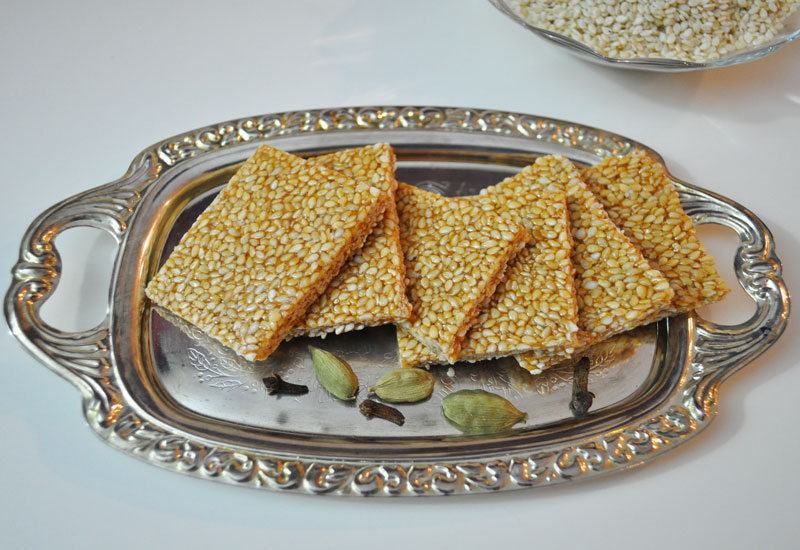
Making food products - chikki, nan kattai, biscuit, cake, jam, jelly, ketchup,   and Water testing,
Haemoglobin testing,
Blood testing,
Solar drying.
Operating of bio gas plant
Tube light repairing
Repairing drill machine
Types of wiring - go down wiring, two way switch wiring, hospital wiring, parallel circuit, series circuit(electronic PCB milling aor soldering.
Making frames and grills
Making shed, Construction, plaster,
Making RCC column Threading and taping
Bending metal sheets,
Brick making, Making chalk.


PROJECTS AND ASSOCIATED SKILLS

In Agriculture and husbandry section I did a project on Methi Plantation.


bipin.jpgimages (5).jpgimages (3).jpg
In home and health section, I did a project on Matka Pickle
IMG-20180609-WA0001.jpgIMG-20180609-WA0009.jpg


In Worshop Section I did Project on Hand Seed Sowing Machine


DSCN1535.JPG


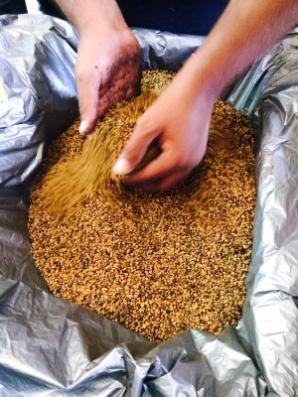
In Electrical Section, I did Project On Reparing Wheat Flour Machine

C:\Users\Vigyan\Downloads\20180617_100028 (1).jpgC:\Users\Vigyan\Downloads\20180617_100002.jpgC:\Users\Vigyan\Downloads\20180617_100007 (1).jpgC:\Users\Vigyan\Downloads\20180617_100042.jpg

Friday 8 June 2018

Foodlab Project


Project Report

 Year 2017-2018

Vigyan Ashram Pabal


Section name :- Home and Health

 Project name :- Matka Pickle 

Project done by :- Bipin bhingare

 Reference teacher :- Reshma mam 

Project starting date :- 1-5-2018

 Project ending date :- 2-5-2018


Introduction :- People eat different types of pickle in their day to day life . while having lunch and dinner we get packing pickle its taste is different . In village people make pickle at home . So I dicided to make pickle in matka how it taste . So I made raw mango pickle.


Project name :- MATKA PICKLE


Aim :- we eat pickle in our day to day life . So I think we do pickle and we keep in plastic bottle so I decided to do different who nobody has done in vigyan ashram . So I choose matka pickle as my project and how it taste .


Tool and accessories :- matka , raw mango , oil , hing , masala , pickle masala , cotton cloth , gas , spoon , plate , mahuri dal , salt ect .


Pre-planning :- first I had taken information from my mom , then I asked to section teacher reshma mam , After that I brought small sand pot and kept two days soaked in water . Then I search info about that pickle on net and asking friends all then I brought material need to it ,


Procedure :- 1) first I had taken info about my project . 2) Then I decided to make raw mango pickle .

3) Then I removed cough costing about the project .

4) I brought sand matka from village and put in water for 2 days because sand taste goes afer putting in water


5) While doing project I brought 2 kg raw mangos cutted into small pieces

6) After that process I mix turmeric powder and salt in that cutted pieces and put in sunlight for 2 hours 7) By putting in sunlight that raw mango become dry .

8) After that wet madka kept in sunlight for drying 9) After taken oil and kept for boiling .

10) That time I had mixed pickle masala and all normal masala like garam masala , mirchi masala ,coriander powder and salt in that raw mango .

11) After that I had kept boil oil for cooling .

12) Then I had put mixed masala and raw mango in matka .

13) Then I put cooled oil in that matka , then I mixed with spoon .

14) After I tight the matka face with handker chief and kept for preservation .


Observation :- while doing work I had taken safety of gas and pickle taste .


Costing:-


Sr no
Material
Quantity
Rate
Amount
1
Matka
1
100
100
2
Raw mango
2 kg
40/kg
80
3
Oil
1 kg
80/kg
80
4
Pickle masala
100 gr
550/kg
55
5
Garam masala
5 gr
72/200 gr
1.80
6
Mirchi masala
20 gr
55/200 gr
5.50
7
Turmeric
10 gr
55/200 gr
2.75
8
Salt
200 gr
15/kg
3
9
Gas
10 min
-
1


Total Labour charge
329.05 82.5 411.55


Result :- the project is successful . We tested that pickle and it taste is yummy and spicy .


Obstacles :- I had done first time this project . I was not knowing how to do . I had taken help of mom .


Reference :- Reshma mam , friends , and internet .


PHOTO :-


Wednesday 18 April 2018

Home And Health ( FoodLab)

                           1.   Information Of Food Lab

                                    Heating Kettel

                                   Electronic Mixer 

                            Nitrogen Gas Packing Machine 

                                   Packing Machine 

                                          Dryer 

                                 Fruit Pulper Machine

                                                               Fealler Machine 

                                       Amla Cutter 

Bootle Cap Machine 

                                              
                                      Microven 


                                             2.   Pop-Corn

Ingredients

  • 3 Tbsp coconut, peanut, or canola oil (high smoke point oil)
  • 1/3 cup of high quality popcorn kernels
  • 1 3-quart covered saucepan
  • 1 Tbsp or more (to taste) of butter (optional)
  • Salt to taste
1. Heat the oil in a 3-quart thick-bottomed saucepan on medium high heat. If you are using coconut oil, allow all of the solid oil to melt.
2. Put 3 or 4 popcorn kernels into the oil.
3. When the kernels pop, add the rest of the 1/3 cup of popcorn kernels in an even layer. Cover, remove  from heat and count 30 seconds. (Count out loud; it's fun to do with kids.)
This method first heats the oil to the right temperature, then waiting 30 seconds brings all of the other kernels to a near-popping temperature so that when they are put back on the heat, they all pop at about the same time.
4. Return the pan to the heat. The popcorn should begin popping soon, and all at once. Once the popping starts in earnest, gently shake the pan by moving it back and forth over the burner.
Try to keep the lid slightly ajar to let the steam from the popcorn release (the popcorn will be drier and crisper).
Once the popping slows to several seconds between pops, remove the pan from the heat, remove the lid, and dump the popcorn immediately into a wide bowl.
With this technique, nearly all of the kernels pop, and nothing burns.
5. If you are adding butter, you can easily melt it by placing the butter in the now empty, but hot pan. Note that if you let the butter get just a little bit brown, it will add an even more intense, buttery flavor to the butter and to your popcorn.
 Just drizzle the melted butter over the popcorn and toss to distribute.
6. Salt to taste.
Additional tips: 
a. If you add salt to the oil in the pan before popping, when the popcorn pops, the salt will be well distributed throughout the popcorn.
b. Fun toppings for the popcorn - Spanish smoked paprika, nutritional yeast, cayenne powder, chili pepper, curry powder, cumin, grated Parmesan cheese.


                                  3.Til Chikki 


Til Chikki Recipe

Ingredients

  • 1/2 Cup Sesame Seeds (Til)
  • 1/2 Cup Jaggery (Gur), grated
  • 1 Teaspoon Water
  • 1 Teaspoon Ghee
  • 1/2 Teaspoon Cardamom Powder
Til chikki is made during Sankranti (Uttarayan). Very nutritious and full of iron, seasme is good for health if consumed in winter. It is made by blending jaggery and sesame seeds together and lightly flavored with cardamom. In Gujarat til chikki is known as Tal Sankaliand this special recipe is savoured on the Makar Sankrant day. In Maharashtra there is a tradition of saying – ’tilgul ghya god god bola’ meaning ‘Accept these tilguls and speak sweet words

Procedure:
  1. Heat a non stick pan on medium heat, add sesame seeds.
  2. Gently roast sesame seeds until light golden in color, stirring continuously.
  3. Remove from heat and keep aside.
  4. Grease rolling pin, counter top or cutting board with ghee.
  5. Heat a non stick pan on medium low heat, add grated jaggery and water.
  6. Melt and simmer until it turns dark brown, stirring continuously.
  7. To check it is done, add a drop of jaggery mixture to cold water, it forms into hard ball like a brittle consistency.
  8. Add ghee and cardamom powder, mix well.
  9. Turn off the heat and add roasted sesame seeds.
  10. Mix it thoroughly until sesame seeds are fully coated.
  11. Immediately pour this mixture on top of greased surface.
  12. Roll into a even big round, using a greased rolling pin, cut them immediately.
  13. Allow to cool and store in an air-tight container.                                                                                                                                                        4.   Cocunut Chikki                                                                                                  
  14. Ingredients:

    400 grams Dry grated coconut(nariyal)
    150 grams Brown sugar( bhuri cheeni)
    150 grams Sugar(cheeni)
    2-3 tbsp. Ghee(tel)

    How to make coconut chikki:

    • Take a pan and put ghee.
    • When it melts put grated coconut.
    • In another pan mix brown sugar, sugar and water and boil.
    • When the mixture becomes hard add coconut and mix.
    • Take a bit plate with high sides and apply a little oil.
    • Pour the mixture in it.
    • Cut and let it cool.                                                                                                                                                                                                                           5. Groundnut Chikki
      • Ingrediant :-
      • Peanuts - 250 gm.
      • Jaggery or Sugar – 250 gm.
      • Ghee – 1 1/2 Small Spoon

  1. How To make Chikki:-If you have bought roasted peanuts from the market then peel of their skin. If you want to roast peanuts at home, then mix one small spoon of water in them, after 2 to 3 minutes roast them in a microwave for 4 to 5 minutes. If they are not properly roasted, then roast them for another 2 minutes. Peel off the skin after they have cooled.
    Put small spoon of ghee in the frying pan and heat it. Then break the jaggery and put it in the frying pan and keep stirring with a frying spoon (on medium flame). The jaggery starts melting. Do not stop stirring. After 6-7 minutes take out one drop of syrup on a plate, if it starts freezing, then the syrup is ready. If it doesn't freeze then cook for another 2-3 minutes and test. The syrup is ready now.
    Mix the peanuts in the syrup and cook for 2 to 3 minutes, while stirring vigorously. Put the ghee on a plate to make it oily. Now take out the ready syrup or chikki from the frying pan and quickly spread it on the oily plate. Cut it into your preferred size with a knife. After they have cooled separate the pieces.
    The amazingly delicious Peanuts Chikki is ready now. Store it in an air tight container, so that you can have the chikki, whenever you feel like it.                                                                                                                                                                                                                    6.Tomato Ketchup 
  2.   Ingridients:-

    1 1/2 kgs Tomatoes (Tamatar)
    1 tsps chilli powder
    1 1/2 cups Sugar (Cheeni)
    2 Cloves (Lavang)
    1 Cardamom (Elaichi Moti)
    1/4" piece Cinnamon (Dalchini)
    2 tsps chopped Ginger (Adrak)
    4 cloves Garlic (Lasun)
    1 cup Vinegar (Sirka)
    2 tsps Salt (Namak)
    1/2 tsp glacial acetic acid
    2 tsps sodium benzoate 

    How to make tomato ketchup:

    • Chop the tomatoes, garlic and ginger and put in a degchi and cook on a low fire till tender and thick.
    • Pass through a sieve.
    • Add vinegar, sugar and chilli powder and cook until thick.
    • Add acetic acid and sodium benzoate mixed in 1/4 cup boiling water.
    • Pour the ketchup in bottles and cork tightly.
    • Use after one week. This tomato ketchup can be kept for one year.                                                                                                                                                                                                                                                                                                                                                                                    

                                7.   Mix Fruit Jam


Ingredients :- 

  • Apple - 1 kg 
  • Banana - 1 kg 
  • Pineapple - 1 kg 
  • Sugar  - one and a half kg 
  • Citric Acid 2 tsp 
  • Methods :-
  • All hard fruit (e.g. apples) used should be boiled and peeled, and cut in hot water.
  • Cut and boil fruits in very little water till soft.
  • Blend with manual mixie.
  • Add sugar and cook on high flame.
  • When sugar dissolves completely, add citric acid
  • Stir and cook till thick. Add colour and essence while hot.
  • essence - 3/4 tsp                                                                                                                                                     

                                  
                              8. Oil Peller Machine
                              
Peanut oil press machine is a kind of screw oil press. Peanut oil press functions through mechanical pressure that oil can be squeezed out of oil crops in high pressure to achieve Peanut oil press machine is a kind of screw oil press. Peanut oil press functions through mechanical pressure that oil can be squeezed out of oil crops in high pressure to achieve the purpose of oil pressing. Squeezed crude oil is edible after being filtered by the vacuum oil filter.
                                           
                                             9. Testing Of Blood Group                                                                                                                                                                                                                                                            

How do you determine a patient's blood type?

You need to know the patient’s blood type in order to make safe blood transfusions. Primarily you try to give the same blood type in a blood transfusion as the patient has got. From Tutorial 1 you know that the blood type notation indicates what antigens there are on the surface of the red blood cells. So, to determine blood type, you need to find out which antigens are present. You can work that out by mixing the patient’s blood with three different reagents containing either of the three antibodies: A, B or Rh.
Test tubes containing three different reagents with either A, B or Rh antibodies. The antibodies attach to antigens on the patient's red blood cells if they match.


Blood typing procedure:

1. Mix!

First mix the patient's blood with three different reagents including either of the three different antibodies, A, B or Rh antibodies!


2. Look for agglutination!

Then you take a look at what has happened. In which mixtures has clumping, or agglutination, occurred? The agglutination indicates that the blood has reacted with a certain antibody and is therefore not compatible with blood containing that kind of antibody. If the blood does not agglutinate, it indicates that the blood does not have the antigens binding the special antibody in the reagent.


3. Figure out the ABO blood group!

Start by taking a look at the test tubes containing A and B antibodies. Has the blood agglutinated in either of these two tubes?
No agglutination in test tube A, indicates that the patient's red blood cells do not have A antigens.
Agglutination in the tube containing B antibodies indicates that the patients' red blood cells have got B antigens, thus belongs to blood group B.


4. Figure out the Rh blood group!

Now have a look at the test tube containing Rh antibodies! Has the blood agglutinated or not?
No agglutination indicates that the patient's red blood cells don't have Rh antigens, thus the blood is Rh-.


5. Figure out the blood type!

Now that you know which antigens are in the patient's blood, you can figure out the blood type!
Since agglutination only occured in the test tube containing B antibodies, the blood got B antigens but no A or Rh antigens. Thus the blood type is B Rh- .


Test yourself!

Can you determine the blood type?

Agglutination in all three test tubes indicates that all three antigens are present in the blood: A, B and Rh. Accordingly, the blood type is AB Rh+.

Can you determine the blood type?

Agglutination in the test tubes containg A antibodies and B antibodies. Accordingly, the blood type is AB Rh-.

Can you determine the blood type?


Agglutination in the test tube with Rh antibodies indicates that the blood has got Rh antigens but no A nor B antigens.
The blood type is O Rh+


                                                            10.   Hemoglobin 


Principle:-
Blood is mixed with an acid solution so that hemoglobin is converted to brown-colored acid hematin.
This is then diluted with water till the brown color matches that of the brown glass standard. The hemoglobin value is read directly from the scale.

hemoglobinometerEquipment:-
(1) Sahli’s hemoglobinometer: This consists of Sahli’s graduated hemoglobin tube (marked in grams and percent) and a comparator with a brown glass standard.
(2) Sahli’s pipette or hemoglobin pipette (marked at 20 μl or 0.02 ml).
(3) Small glass rod (stirrer).
(4) Dropping pipette.

(1) N/10 hydrochloric acid
(2) Distilled water
Specimen: EDTA-anticoagulated venous blood or blood obtained by skin puncture.

Method:-
(1) Place N/10 hydrochloric acid into Sahli’s graduated hemoglobin tube up to the mark of 2 grams.
(2) Take blood sample in Sahli’s pipette exactly up to 20 μl mark. Blood adhering to the exterior of the pipette is wiped away using absorbent paper or gauze.
(3) Add blood sample to the acid solution, mix with a glass stirrer, and allow to stand for 10 minutes.
(4) Add distilled water drop by drop till the color of the solution matches that of the brown glass standard.
(5) Take the reading of the lower meniscus from the graduated tube in grams.

Note:
(1) Although the graduated tube is marked in both grams and percent figures, result should always be reported in grams. This is because (a) no single hemoglobin value can be considered as 100% since it varies with the age and sex of the individual and altitude, and
(b) hemoglobinometers of different manufacturers have different values as 100%, so that same sample of blood will yield different results on different instruments.
(2) Disadvantages of Sahli’method:
• About 95% color of acid hematin is attained at the end of 10 minutes. For maximum color development, much longer time (1 hour) is required.
• Perfect matching with the brown glass standard is not possible.
• Carboxyhemoglobin, methemo-globin, and sulfhemoglobin are not converted to acid hematin. HbF is also not converted to acid hematin and therefore this method is not suitable in small infants.
• Development of color is slow and acid hematin solution is not stable.
• Source of light (daylight or artificial) will influence the visual comparison of colors.
• Personal error in matching brown glass standard with test solution is 10%.
• Color of brown glass standard fades with time.                                                                                                                                                                                                                                                                                                                                                                        11.   Yoga 


Basic Yoga: Understand Yoga For Good Health

Understanding even basic yoga principles is not easy for a beginner. Yoga is a complex discipline and it may take years for a person to perfect it. Yogis are the persons who devote their entire life to practice of yoga. Yogis even in their eighties can surprise you with their firm posture, glowing texture of their skin and their flexibility to perform yoga asanas.
Fortunately, basics of yoga are really simple. Yoga is a practical discipline to be followed. As a beginner you can start with a very simple yoga sequence. You can start slowly and then progress at your own pace. A beginner to yoga should not start with rigorous exercises or difficult poses.
Set your own goals after you feel positive effects of yoga in your life. Even following a few simple asanas and pranayama can help you to save thousands on your doctor's bill.

Who Can Do Yoga?

  • There is no age limit for practice of yoga. Any body who is in good health from the age of 12 years up to 100 years (only regular practitioners) can practice yoga. Children below 12 years of age must do yoga only under supervision of an experienced yoga teacher.
  •  All yoga poses (asanas) and pranayama are  safe for people in perfect health with no known medical problems, provided correct technique is followed.
  •   If you have some health issues/medical problem, seek guidance of your doctor before starting yoga.
  •  Your yoga teacher can  guide you to asanas which may be especially suitable for you and also asanas which should be avoided.
  • Women need to  consult their doctor when starting yoga after child birth.
  • Women need to take precautions for doing yoga during menstrual period.
  • Seek advice of your doctor before starting yoga after  surgery.
  • Weak, inflexible and obese persons can  start yoga  under guidance of yoga teacher.

Choose Yoga For Your Requirements

In case, you are keen to become a yogi, you may have to devote your life for yoga practice under supervision of a yoga guru. But what we are searching here is a practical way to improve our day-to-day living. Why to wait indefinitely for starting yoga? You can integrate yoga with your life right away. Start with me right now!
There is lot of commercialisation of yoga. Therefore, it becomes very difficult for a beginner to decide on how to start yoga without spending money. There are various types of yoga being taught by different people. For beginners there is a need to focus on simple asanas. Yoga in its simplified form can be practiced by anybody with 30 minutes to one hour to spare.

How To Start Yoga Practice?

This site will provide you an overview of yoga where you can start with basic yoga sitting at home. The exercises covered will be such that can be carried out by healthy persons by carefully reading the instructions. Our main goal is to spread the awareness of yoga to people who don't have access to any guide or guru but are keen to start yoga. Understanding basics of yoga is very essential for your further progress in yoga.
Practicing of basic yoga does not require any elaborate planning or euipment. You need to  be regular with yoga practice to get optimum benefits.
However for advanced yoga techniques and spiritual progress, it would be extremely difficult and sometimes harmful to proceed without the constant guidance of a Guru.

1.Mountain Pose

Mountain Pose is the base for all standing poses; it gives you a sense of how to ground in to your feet and feel the earth below you. Mountain pose may seem like “simply standing,” but there is a ton going on.
How to do it: Start standing with your feet together. Press down through all ten toes as you spread them open. Engage your quadriceps to lift your kneecaps and lift up through the inner thighs. Draw your abdominals in and up as you lift your chest and press the tops of the shoulders down.
Feel your shoulder blades coming towards each other and open your chest; but keep your palms facing inwards towards the body. Imagine a string drawing the crown of the head up to the ceiling and breathe deeply in to the torso. Hold for 5-8 breaths.

2. Downward Facing Dog

Downward Dog is used in most yoga practices and it stretches and strengthens the entire body. I always say, “a down dog a day keeps the doctor away.”
How to do it: Come on to all fours with your wrists under your shoulders and knees under your hips. Tuck under your toes and lift your hips up off the floor as you draw them up at back towards your heels.
Keep your knees slightly bent if your hamstrings are tight, otherwise try and straighten out your legs while keeping your hips back. Walk your hands forward to give yourself more length if you need to.
Press firmly through your palms and rotate the inner elbows towards each other. Hollow out the abdominals and keep engaging your legs to keep the torso moving back towards the thighs. Hold for 5-8 breaths before dropping back to hands and knees to rest.

3. Plank

Plank teaches us how to balance on our hands while using the entire body to support us. It is a great way to strengthen the abdominals, and learn to use the breath to help us stay in a challenging pose.
How to do it: From all fours, tuck under your toes and lift your legs up off the mat. Slide your heels back enough until you feel you are one straight line of energy from your head to your feet.
Engage the lower abdominals, draw the shoulders down and away from the ears, pull your ribs together and breathe deeply for 8-10 breaths.

4. Triangle

Triangle is a wonderful standing posture to stretch the sides of the waist, open up the lungs, strengthen the legs and tone the entire body.
How to do it: Start standing with your feet one leg’s-length apart. Open and stretch your arms to the sides at shoulder height. Turn your right foot out 90 degrees and your left toes in about 45 degrees.
Engage your quadriceps and abdominals as you hinge to the side over your right leg. Place your right hand down on your ankle, shin or knee (or a block if you have one) and lift your left arm up to the ceiling.
Turn your gaze up to the top hand and hold for 5-8 breaths. Lift up to stand and repeat on the opposite side. Tip: I like to imagine I’m stuck between two narrow walls when I’m in triangle pose.

5. Tree

Tree is an awesome standing balance for beginners to work on to gain focus and clarity, and learn to breathe while standing and keeping the body balanced on one foot.
How to do it: Start with your feet together and place your right foot on your inner left upper thigh. Press your hands in prayer and find a spot in front of you that you can hold in a steady gaze.
Hold and breathe for 8-10 breaths then switch sides. Make sure you don’t lean in to the standing leg and keep your abdominals engaged and shoulders relaxed.

6. Warrior 1

Warrior poses are essential for building strength and stamina in a yoga practice. They give us confidence and stretch the hips and thighs while building strength in the entire lower body and core.
Warrior 1 is a gentle backbend; and a great pose for stretching open the front body (quads, hip flexors, psoas) while strengthening the legs, hips, buttocks, core and upper body.
How to do it: For warrior one, you can take a giant step back with your left foot coming towards a lunge, then turn your left heel down and angle your left toes forward 75 degrees.
Lift your chest and press your palms up overhead. Step forward and repeat on the opposite leg.

7. Warrior 2

Warrior 2 is an external hip opener and opens up the inner thighs and groin. It’s a good starting point for many side postures including triangle, extended angle and half moon balance.
How to do it: Stand with your feet one leg’s-length apart. Turn your right toes out 90 degrees and your left toes in 45 degrees. Bend your right knee until it is directly over your right ankle while keeping the torso even between the hips.
Stretch your arms out to your sides and gaze over your right hand. Hold for 8-10 breaths before straightening the right leg and turning your feet to the other side to repeat on left side.

8. Seated Forward Bend

It’s important to incorporate a forward bend in yoga practice to stretch the hamstrings, lower and upper back and sides. Seated forward bend is the perfect fold for everyone to start to open up the body and learn to breathe through uncomfortable positions.
If you feel any sharp pain, you need to back off; but if you feel the tension when you fold forward and you can continue to breathe, you will slowly start to loosen up and let go. You can also keep your knees bent in the pose as long as the feet stay flexed and together.
How to do it: Start seated with your legs together, feet firmly flexed and not turning in or out, and your hands by your hips. Lift your chest and start to hinge forward from your waist. Engage your lower abdominals and imagine your belly button moving towards the top of your thighs.
Once you hit your maximum, stop and breathe for 8-10 breaths. Make sure your shoulders, head and neck are all released.

9.  Bridge Pose

A counter pose to a forward bend is a back bend. Bridge is a good beginner’s back bend that stretches the front body and strengthens the back body.
How to do it: Lie down on your back and place your feet hip width apart. Press firmly on to your feet and lift your butt up off the mat. Interlace your hands together and press the fists down to the floor as you open up your chest even more.
Imagine dragging your heels on the mat towards your shoulders to engage your hamstrings. Hold for 8-10 breaths then lower your hips down and repeat two more times.

10. Child’s Pose


Every one needs a good resting pose and Child’s pose is an awesome one not just for beginners but for yoga practitioners of all levels.
It’s good to learn child’s pose to use when you’re fatigued in Down Dog, before bed at night to work out the kinks, or anytime you need a mental break and stress/tension relief.


How to do it: Start on all fours then bring your knees and feet together as you sit your butt back to your heels and stretch your arms forward. Lower your forehead to the floor (or block or pillow or blanket) and let your entire body release. Hold for as long as you wish.

                               12.Pizza Making

Aim: Learning how to make Pizza.

Ingredients: Maida, Tomato, Onion, Chilli, Garlic, Cardamom, Red Chilli Powder.

Tools: Knife, Plate, Kadhai, Spoon, Oven.

Process: Make a dough out of maida and water.
               Then place a tava on the stove and flatten the dough keeping the edges bulgy.
              While making the base, take tomatoes, garlic, cardamom, spice and make a thick paste of it.
               Layer the base with the paste.
               Add some toppings on the pizza and bake in the oven for 10-15 minutes.

              13.Water Testing


Aim: H2S Strip Test Learning, and calculating whether water is potable or not.

Materials: H2S Strip Test Bottle, Water Sample.

Process: Take 100ml of water sample.
               Fill the chemical till the marked level add the 100ml water sample.
               After filling the mixture close the bottle tightly and mix it slowly.
               Keep the bottle in a cool shady place.
               It takes 48 hours for the colour to change.

Observation: If the colour changes to blackish the water is not potable.

                       If the colour changes to yellow the water is potable.

                             14.First Aid Box


Administering the right first aid to a victim can make all the difference in the world. Not only can it assure a speedy recovery, but at times it can make a life-threatening situation more manageable. Having a well-equipped first-aid box at home is very important, especially when you have kids and pets in the house. In an emergency, it is the contents of this box that will come to your aid while you suffer through a long drive to the hospital or wait for the ambulance to come to your front door.

Your first-aid box must have the ultimate solution for common ailments. Whether you have a headache, an allergic reaction, a broken toenail or have suffered a few burns, it is these items in your first aid box that will provide instant relief. However, don’t just stock it and forget about it. You must remember to clean and re-stock your medicines and creams time and again. Do look at the expiry dates and throw out items that have lived their life. In an emergency, nothing can be worse than having an expired medicine or tube of gel in your first aid box.

So find out the top 10 things that must be included in your home first aid box.

1. Adhesive Bandages
It is never a good idea to leave cuts and scrapes uncovered. So go ahead and buy a few adhesive bandages since they come in all colours, sizes and shapes. You might want to pick the larger ones for bigger cuts, and smaller ones for shaving cuts and smaller scrapes. Also, find colourful ones that your kid will want to wear proudly instead of ripping off. Also, talk to your vet if you have pets and get bandages meant for dogs or cats (whatever the case may be).

2. Antiseptic Creams And Lotions
Before you put on that bandage, you will need to thoroughly clean a wound. While soap and water work fine, it is advisable to use a good antiseptic lotion to thoroughly rinse out any debris or particles in the wound that could infect it. Also, if the wound is large and could get pus formation, you will need to use an antiseptic regularly while you dress up the wound. So buy Dettol or Savlon to kill all germs and bacteria that can thrive in an open wound.

3. Muscle Creams And Sprays
Having a sprain or a backache is one of the most common ailments people complain of, second only to headaches. To ensure that your aching muscles get instant relief, do stock up on muscle creams and gels. A spray is a more effective option, especially when you want to couple it with a heating pad. However, you should use them in moderation as the ingredients do get absorbed directly in to your bloodstream through the skin.

4. A Pair Of Tweezers
A fine-tipped pair of tweezers can come in handy in so many ways. Remove foreign objects lodged in the skin like splinters. Or easily remove your dog’s ticks using them. Make sure you sterilise the tweezers by cleaning them with an antiseptic lotion.

5. Sterile Gauze And Tape
For bigger injuries, especially those that are bleeding profusely, you will need sterile gauze and medical tape to create a larger bandage. Where a band-aid seems to be too small to cover the wound, use these two. Create padding with sterile gauze, apply a little antiseptic cream, and cover the wound. Then secure in place with the tape. These also work especially well on kids and pets since they cannot remove this as easily.

6. Pain Relievers
What’s more common than a headache or backache? Having a few pain relievers like Crocin and Combiflam in your first-aid box is a must. Even if the pain is persistent and needs to be checked by a doctor, you can still pop a painkiller to help you bear with the trip down to the clinic and the long wait before you get the turn to meet with your doctor. If you have kids, keep some mild pain relievers at hand. And if you have pets, make sure you talk to your vet about the best painkiller for dogs and cats. Remember, while most human medicines work on dogs, some of them can be poisonous to their system.

7. Antihistamines
With all the changing weather and increased pollution, which household doesn’t have people who develop allergic reactions easily? From sneezing to breaking out in a rash, antihistamine will take care of all allergies. While sinus and dust allergies might not need medical attention, a food allergy might need a trip to the doctor. In any case, the allergy medication will provide a little relief while you rush the patient to the emergency.

8. Fungal Medicines
If you live in a hot, humid climate for any part of the year, you’ll be well aware of the risk of fungal infections. These infections can erupt anytime, anywhere. From your genitals to your feet, your face and hands, these fungal infections can be itchy and embarrassing. So make sure you have an anti-fungal cream at home to provide relief from the persistent itch. You can get these in the form of gels, creams, powders and even pills.

9. Nail Clippers
Yes, these also find themselves on the list of top 10 things to keep in a first-aid box. You may think that cutting your nails and shaping them can pose no emergency, but what about a painful ingrown toenail? And not to mention painful hangnails that can actually get infected if chewed on or ripped out. So make sure you have nail clippers in your first-aid box to clip nails and hangnails and keep the nails clean. You might not realise this but dirty nails are the biggest cause for fungal infections, bacterial growths and warts.

10. Thermometer And Fever Medication
Any first-aid box is incomplete without a good thermometer. And make sure you buy the right kind. No longer do doctors recommend a mercury thermometer. Get yourself a digital thermometer, and if you have kids and pets, we recommend you get an ear-canal thermometer. Fevers are common, so do keep Crocin or basic paracetamol to ensure that you can regulate normal body temperature while your doctor diagnoses the cause. He may further recommend antibiotics or other medication, but popping an antipyretic will help you while you wait for the diagnosis.

So, here are the top 10 things to keep stocked in your first-aid box. Go ahead and pick a good-sized box to create your very own first-aid kit or buy a ready made one and start storing away these things for uncalled emergencies.


                  15.Calories


Calories are units of energy. Various definitions exist but fall into two broad categories.The first, the small calorie, or gram calorie (symbol: cal), is defined as the approximate amount of energy needed to raise the temperature of one gram of water by one degree Celsius at a pressure of one atmosphere.

the energy needed to raise the temperature of 1 kilogram of water through 1 °C, equal to one thousand small calories and often used to measure the energy value of foods.

 The above diagram shows an example of a person who will lose weight. They consume 2000 calories per day, and burn 2500. As you can see, they are burning 500 more calories than they are consuming. This calorie deficit is what causes weight loss. The above diagram shows an example of a person who will lose weight. They consume 2000 calories per day, and burn 2500. As you can see, they are burning 500 more calories than they are consuming. This calorie deficit is what causes weight loss


            16.Sweet Amla Pickle


Indian gooseberry (Amla/ Nellikai) - 1 kg
Salt - ½ cup
Turmeric Powder - 1 tsp
Sesame oil - ¾ cup
Suger Powder - ½ cup
Asafoetida - 1 tsp
Methi powder - ¼ cup
Lemons 4 medium size
mustard seeds ½ tsp
Instructions
Wash the amla/gooseberries throughly and dry them.
Heat sesame oil in a wide pan and when the oil is hot add mustard seeds and hing. when the mustard seeds splutter, add the amla to the oil. Cover the pan and cook the amla/gooseberries till they are withered. Check and Keep truning the amlas in between.
Once they are cooked remove the lid and cook for 2 minutes till the water is lost. Now switch off the flame and allow it to cool.
Add salt, red chilli powder, methi powder and turmeric powder to it.Add lemon juice to this. Mix well.
Let the pickle absorb all the flavours for atleast 3 day amla pickle is ready . 


                17.Amla Supari


Instrument: steei vesal , knife 
Ingredient: sugar ,amla supari masala , [salt , jira powder , black salt ]
Procedure : first wast the amla's for then prick them after that boil it in steel vessal after that  make small cuts of  after that for 5kg of amla add jira powde 100 gm ,black salt  and leaue it for drying prosses
Observation: If amia is 10 kg we got 3kg amla supari 

             18. Chocolate Cake


Ingredients


For the cake
225g/8oz plain flour
350g/12½oz caster sugar
85g/3oz cocoa powder
1½ tsp baking powder
1½ tsp bicarbonate of soda
250ml/9fl oz milk
125ml/4½fl oz vegetable oil
2 tsp vanilla extract
250ml/9fl oz boiling water
For the chocolate icing
200g/7oz plain chocolate
200ml/7fl oz double cream


Method
Preheat the oven to 180C/350F/Gas 4. Grease and line two 20cm/8in sandwich tins.

For the cake, place all of the cake ingredients, except the boiling water, into a large mixing bowl. Using a wooden spoon, or electric whisk, beat the mixture until smooth and well combined.

Add the boiling water to the mixture, a little at a time, until smooth. (The cake mixture will now be very liquid.)

Divide the cake batter between the sandwich tins and bake in the oven for 25-35 minutes, or until the top is firm to the touch and a skewer inserted into the centre of the cake comes out clean.

Remove the cakes from the oven and allow to cool completely, still in their tins, before icing.

For the chocolate icing, heat the chocolate and cream in a saucepan over a low heat until the chocolate melts. Remove the pan from the heat and whisk the mixture until smooth, glossy and thickened. Set aside to cool for 1-2 hours, or until thick enough to spread over the cake.

To assemble the cake, run a round-bladed knife around the inside of the cake tins to loosen the cakes. Carefully remove the cakes from the tins.

Spread a little chocolate icing over the top of one of the chocolate cakes, then carefully top with the other cake.

Transfer the cake to a serving plate and ice the cake all over with the chocolate icing, using a palette knife.

             19.Amla Candy


Amla candy is an amazing dessert recipe that is loved by the kids. You might have purchased amla candy in the market, but we will tell you how to make it at your own home and you will never need to buy it again. The kid friendly Indian candy is high on vitamins and minerals, so it is probably the only candy with loads of goodness. Made with easy boiling of amla, this recipe won't take much time to make if ingredients are ready. You can store dried amla for many days with this recipe. Learn how to make it with our step by step guide.

 Method

1. Wash and dry gooseberry with kitchen towel. 2. Make in the gooseberry. 3. Amla Candy: 4. Boil enough water in a vessel, add gooseberry, boil for 2 minutes and drain excess water. 5. Cut the gooseberry in slices. 6. Add cumin powder and dried ginger powder over the top. 7. Cover it with sugar, close the lid and set aside. 8. Next day slices will float in sugar water. 9. On the third day slices will settle at bottom. 10. Now filter the slices and collect the syrup (store it in refrigerator and use it as Gooseberry Sherbet). 11. Dry these filtered slices in sunlight for two days. 12. Sprinkle sugar powder mixed with edible colour of your choice and store it in an air tight container. 13. Enjoy the candies formed. 14. Recipe 

Ingredients

 250 g - gooSeberry 1 tsp - Cumin seeds powder 1 tsp - dried Ginger powder (saunth) 150 g - Sugar 2 tbsp - Sugar powder 1/2 pinch - edible food color (optional)

               20.Butter


Ingrediant - maida(5 kg) , salt (60 gm) , yeast (100 gm) , water (750ml) 
Instrument - tray , brush , glowers , atta mixture , peel tool                                    .

Procedurefirst take atta with the help of atta maida , sugar , salt , yeast in atta machine add water of mix it properly when atta is ready put oil layer tray make small oval shape of atta & put  that on tray when tray is full put that on side don't move that for heat our brick oven 450 % with wood put our pav tray in oven with help of baking  when you remove it layer oil on pav when it cool remove it from tray & our pav is ready    


Observation 1) when we roast bane in oven its colour will be change in liquid brown when oven heat it will black in colour . 2) when we put 's our bane in slide it will be blow .


                                   21.Pav 
Ingrediant - maida(5 kg) , salt (60 gm) , yeast (100 gm) , water (750 ml)

                                           
Instrument - tray , breash , glowers , atta mixture , peel tool                                    .

Procedure - First take atta with the help of atta maida , sugar , salt , yeast in atta machine add water of mix it properly when atta is ready put oil layer tray make small oval shape of atta & put  that on tray  when tray is full put that on side don't move that for heat our brick oven 450 % with wood put our pav tray in oven with help of baking  when you remove it layer oil on pav when it cool remove it from tray & our pav is ready.    

  Observation1) when we roast bane in oven its colour will be change in liquid brown when oven heat it will black in colour . 2) when we put 's our bane in slide it will be blow


22.Roat Cookies

Roat Cookies

Roat Cookies


Introduction_
We were thinking about our project and while selecting some of the easy going dishes our sir Dr. Yogesh. Kulkarni told us about “Roat” cookies. This is how me and my friend ‘Chinna’ decided to take over the idea and work on it. I would like to share that we both were in profit after selling all cookies because it took hardly 350rs of us for producing it. Let’s take a tour what me and my friend have done.

Ingredients_
1. Semolina 1 kg.

2. Sugar 1/2 kg.

3. Ghee 300 to 350 gms.

4. Milk approx. 350 to 500 ml.

5. Fennel seeds powder 2 - 3 tbsp.

6. Cardamom powder 4 tbsp.

7. Nutmeg powder 2 tbsp.

8. Finely chopped nuts 4 tbsp.

9. Poppy seeds 3 to 4 tbsp.


Recipe_
In a mixing bowl, mix sugar, ghee and all the powder used for flavoring. Blend the mixture till sugar is dissolved. Then add the semolina, chopped nuts and knead the mixture using milk. Roll into small [lemon size] balls and top it with poppy seeds. Preheat the oven and bake it for 18 to 20 mins on 150 degrees. the balls become little flat when you bake it and it should have a light brown color after baking. Allow it to cool and store it in an airtight container.


23.Ragi Cookies

Ragi [Nachani] - Cookies


Introduction_
Let me tell you guys how i got idea of making cookies from this stuff, I have also included all the costing chart and even the reciepe. This cookies are very healthy as they are made using ghee and even the ragi floor. It is very easy to make and hardly it takes 30 to 35 mins to cook all the stuff.

So let's start by introducing you all the ingridients.


Ingredients_

Material.                          Quantity       Rate/Kg   

1. Ragi Floor                     1 Kg              35 rs

2. Butter                            100 Gm         46 rs

3. Sugar Powder                1 Kg              44 rs

4. Milk                               1/2 Ltr           20 rs

5. Cardamom [Elaichi]      5 Gm             10 rs

6. Electricity                      2 unit             2 rs

7. Packing Charge                                    5 rs

8. Labour Charge               25%              12 rs

9. Total                                                    174 rs


Recipe_

A] Procedure :- 1. Spread a whole pack of 100 gm butter in a flat edged steel plate.

2. Now, add [300 gm] of sugar powder in it and mix it by hands.

3. Now, add 1/2 kg of Ragi [Nachani] floor in it and mix it.

4. After mixing neatly add 5 gm of cardamom in it and mix it again !

5. After this process keep for some time to set it and then make small round shapes like cookies or make it in template if you have them.

6. After making shapes bake them in oven at 200*c.                                                                [Note - Set the oven foe pre-heat before using it for baking cookies]

7. When cookies are baked nicely keep them out for sometime and let them cool.

8. Using a normal sealing machine pack four cookies in one packet and your stuff is ready.

b] Result :- In this way you can cook your own stuff and sell it by calculating the whole costing.


24.Cake

Chocolate Plum Cake


Introduction_
It is not necessary to bake cake only on occasions, We can bake any time we want and even it is much healthy sometimes to eat. As a sweet it provides a lot of beneficial nutrients to our body. Cakes are not only favorite of small children even I do like to enjoy it any time I want. Especially there are lot of varieties in cakes mostly people love chocolate cakes but we should try other one's too.

Prep Time - 31-40 minutes
Cook time - 31-40 minutes
Serve - 4
Level Of Cooking - Moderate
Taste - Sweet

Ingredients_
1. Fresh orange juice 1/4 cup

2. Raisins 1/4 cup

3. Black raisins 1/4 cup

4. Almonds chopped 1/4 cup

5. Cashews chopped 1/4 cup

6. pistachios chopped 1/4 cup

7. Tutti-frutti 1/4 cup

8. Candied orange peel chopped 1/4 cup

9. Refined flour 1 cup

10. Cocoa powder 1 tablespoon

11. Baking powder 1 teaspoon

12. Baking soda 1/2 teaspoon

13. Condensed milk 1 cup

14. Butter 1 cup

15. Edible red colour 2 tablespoons

16. Beetroot juice 2 tablespoons

17. Vanilla essence 2 teaspoons

18. Vinegar 1 teaspoon

19. Baskin Robbins Red Velvet Ice-cream 3/4 cup

20. Cream cheese 1 cup

21. Butter 1/2 cup

22. Icing sugar 3/4 cup

23. Vanilla essence 1/2 teaspoon

Recipe_
1. Mix together orange juice, raisins, black raisins, almonds, cashews, pistachios, tutti-frutti and candied orange peels in a bowl. Set aside to soak for a few hours.

2. In a bowl, sieve together refined flour, cocoa powder, baking powder and baking soda.

3. In a separate bowl, mix together condensed milk and butter. Beat with electric beater till fluffy.

4. Add edible food colour, beetroot juice and vanilla essence beat again till combined well.

5. Add the sieved flour mixture and mix well. Add vinegar and mix well.

6. Add Baskin Robins Red Velvet Ice-cream and mix well. Add soaked nuts and candied peels, mix well.

7. Transfer the prepared batter to a greased baking tray.

8. Bake in a pre-heated oven at 180˚C for 30-40 minutes.

9. Mix together, cream cheese, butter, icing sugar and vanilla essence to prepare a smooth frosting.

10. Spread the frosting on top of the cake, sprinkle with red velvet cake crumbs and serve.

Note - It depends on your baking but if you try well and maintain time you can get a well baked cake.